Maintaining a lush, green lawn requires proactive maintenance and many property owners are increasingly realizing the importance of maintaining their lawns themselves. But although it saves you a lot of money in the long run, doing your own lawn care can be a daunting task if you are not well versed with weed control, watering techniques, soil erosion, and other essential aspects of gardening.
Not to worry, though, as we’re here to guide you through the hard bits. In particular, this article deals with all the dos and don’ts of lawn renovation.
Why You Should Renovate Your Lawn
A lot of people balk at the idea of overhauling their yards as it seems expensive on paper. However, renovating your lawn gives you much more than it takes. For instance, getting new and suitable turfgrass helps to reduce soil erosion, which reduces fertilizer costs in the long term. A perennially lush lawn also increases your property value in the event you decide to sell your home. Most importantly, a newly renovated lawn gives you inner peace and happiness when you’re having those outdoor moments with your loved ones.
When to Renovate Your Lawn
If you live in the colder regions, the ideal time for a lawn renovation is at least 45 days before winter. This allows the grass enough time to recover and grow before being inundated with frost. In warmer regions, you can do it any time you wish outside of the long rainy season. Even the smallest runoff can ruin all your work.
Potential Costs
Depending on the situation your lawn is in, the renovation process can cost you anywhere from $100 to several thousand bucks. Apart from the basic seed and fertilizer costs, you may also need to spend on things like weed and pest control, sorting the drainage system, soil testing, and (potential) lime application.
Fortunately, you will easily find most of the products you need for the renovation at your local stores or at your favorite e-store. And while you will most likely be cost-conscious, be careful not to let it blind you as some low-cost products can cost you much more in the long term.
DIY or Outsource?
That said, it would not be prudent to undertake the whole renovation by yourself if your gardening skills are not up to par. Consult a professional landscaper to do the hard bits and you can be left handling the day-to-day maintenance.
If you decide you are skilled enough to do it all by yourself, here’s the cheat code:
Step-By-Step Guide to Lawn Renovation
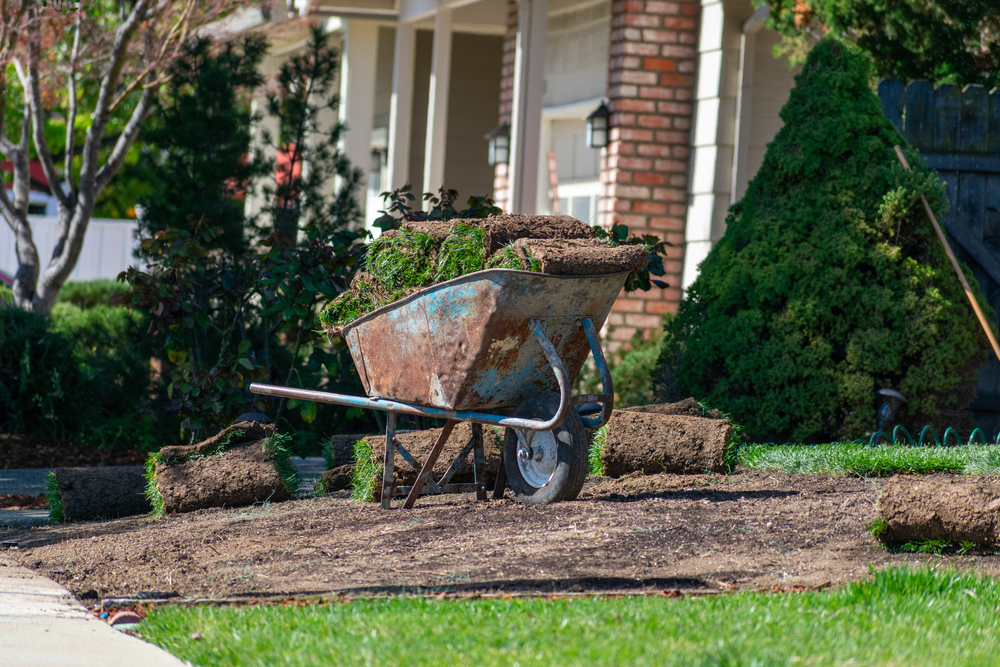
Dethatching – Getting rid of all the thatch patches in the grass should be your first priority as it clears the way for new grassroots to thrive and helps to control insect infestations. If the problem is not so severe, a typical gardening rake will do perfectly, otherwise, you may have to use a “power” rake.
Aeration – This basically involves poking “breathing” holes into the soil and/or breaking up compacted soil to create easy pathways for water, air, and nutrients to reach the grassroots. Aeration should ideally be done after dethatching, and when the soil is moderately wet.
Soil Testing – By knowing what type of soil you’re dealing with, you can better determine what type of grass to get, the fertilizers to use, and your watering schedule. If you are working on a budget, you can get a DIY home kit at most gardening stores. However, we would recommend sending a sample to a credible lab for a more accurate analysis.
Seeding – After knowing your soil profile, particularly the pH, you will be in a better position to determine what seeds to buy. As a rule of thumb, always overseed during the first application to attain a thicker growth. To achieve uniformity, avoid doing it by hand and instead get a hand spreader or specialized lawn spreader if the yard is big. Further, don’t forget to apply a Starter fertilizer soon after seeding to give your seeds a fast start.
Weeding – This process starts with clearing the yard of overgrowth and weeds, way before you do the seeding, and picks pace after the seeds germinate. At that point, the goal is more about prevention than control and involves manually picking off the weeds and applying quality fertilizer for the young seeds. Avoid using herbicides and associated chemicals until after you mow the lawn at least 3 times.
Watering – To attain a near-perfect green lush, you need to keep the lawn adequately watered before, during, and after the renovation process. When the seedlings are young, water at least twice a day to promote healthy germination. Afterward, you can revert back to the usual 1-inch-per-week rule.
Maintenance – A few weeks after seeding, or when the grass has grown to a height of more than two and a half inches, you can begin a lawn care routine. This may include regular mowing and use of pest and weed control products.


