
A thriving, beautiful landscape begins with healthy, well-prepared soil. Whether you’re planting a lush garden, establishing a lawn, or adding ornamental plants, the quality of your soil will directly influence the success of your landscape. Soil preparation is often overlooked but is one of the most critical steps to ensure plants have access to essential nutrients, proper drainage, and an ideal growing environment. In this article, we will discuss how to prepare your soil for landscaping to promote healthy plant growth and ensure long-term success.
Understanding Your Soil Type
Before you begin any soil preparation, it’s essential to understand your soil type. Different soil types—such as sandy, clay, or loam—have varying drainage, nutrient retention, and structural properties. By understanding the characteristics of your soil, you can determine what amendments or adjustments are needed to improve its overall condition.
- Sandy soil has large particles, allowing water to drain quickly but also causing it to dry out rapidly. While it offers good aeration, it doesn’t hold nutrients well.
- Clay soil is dense and slow to drain, often becoming compacted. While it retains nutrients well, it can suffocate plant roots and cause waterlogging.
- Loam soil is the ideal mix of sand, silt, and clay, offering good drainage, nutrient retention, and structure.
To identify your soil type, you can perform a simple texture test by rubbing a small amount of moist soil between your fingers. Clay soils feel sticky, sandy soils feel gritty, and loam feels smooth and crumbly. Once you’ve identified your soil type, you can begin the necessary adjustments to improve its structure and fertility.
Testing Soil pH and Nutrient Levels
Soil pH is a crucial factor that affects the availability of nutrients to your plants. Most plants prefer a slightly acidic to neutral pH range of 6.0 to 7.0. However, some plants, such as blueberries and azaleas, thrive in more acidic soils. Testing your soil’s pH will give you a better understanding of its acidity or alkalinity and allow you to make any necessary adjustments to create an optimal growing environment.
You can test your soil pH using an at-home soil test kit or by sending a sample to a local agricultural extension office or garden center for more detailed analysis. Once you know your soil’s pH, you can amend it accordingly:
- To raise soil pH (make it more alkaline), you can add lime (ground limestone or dolomitic lime).
- To lower soil pH (make it more acidic), you can incorporate sulfur, organic matter, or peat moss.
In addition to pH, it’s essential to test for the nutrient levels in your soil. A soil test will indicate the presence of essential nutrients such as nitrogen, phosphorus, and potassium, as well as any deficiencies. Based on the results, you can add organic compost, fertilizers, or other soil amendments to boost nutrient availability and ensure your plants get the nourishment they need to thrive.
Removing Weeds and Debris
A critical step in preparing your soil is removing any existing weeds, grass, rocks, or debris from the planting area. Weeds compete with your plants for nutrients, water, and sunlight, and they can quickly take over if not addressed before planting. Removing these obstacles not only creates a clean slate for your landscape but also allows your plants to grow without competition from unwanted vegetation.
Begin by clearing the area of rocks, twigs, and other debris. Use a spade, hoe, or weed puller to remove weeds, ensuring you pull them out by the roots to prevent regrowth. For areas heavily infested with weeds, you may consider using a mulch layer or applying an organic weed suppressant, such as cardboard or landscape fabric, before planting.
If you’re dealing with grass, especially in areas where you want to establish garden beds, consider using a sod cutter or shovel to remove the grass altogether. Alternatively, you can use a no-till method by covering the grass with a thick layer of cardboard or mulch and letting it decompose naturally over time.
Aerating the Soil for Better Root Growth
Compacted soil can be detrimental to plant health because it restricts root growth, reduces water infiltration, and limits oxygen flow to the roots. Aerating the soil is a vital step in preparing your landscape, especially if your soil is heavy in clay or has been compacted due to foot traffic, machinery, or construction activities.
To aerate the soil, use a garden fork, aerator, or tiller to loosen the soil to a depth of at least 6 to 8 inches. This process breaks up compacted areas, creates air pockets, and improves water drainage. It also encourages root systems to penetrate deeper into the soil, promoting stronger, healthier plants.
Be cautious not to over-till the soil, as excessive tilling can disrupt beneficial soil organisms and lead to erosion. In most cases, gently loosening the soil to allow for air and water movement will be sufficient. For very compacted areas, incorporating organic matter such as compost or manure during aeration can further enhance soil structure and fertility.
Amending the Soil with Organic Matter
Amending your soil with organic matter is one of the most effective ways to improve its structure, nutrient content, and overall health. Organic matter—such as compost, aged manure, leaf mold, or peat moss—adds essential nutrients to the soil, improves drainage in heavy clay soils, and helps retain moisture in sandy soils.
To incorporate organic matter, spread a 2- to 3-inch layer over the surface of your soil and gently mix it in using a shovel, fork, or tiller. Be sure to work the organic material into the top 6 to 8 inches of soil, where plant roots can access it. Over time, the organic matter will break down, enriching the soil and improving its ability to support healthy plant growth.
If your landscape includes existing garden beds, refreshing the soil by adding a new layer of compost each season can revitalize nutrient levels and improve soil texture. Organic amendments also encourage the growth of beneficial microorganisms, worms, and other soil life that help break down organic matter and make nutrients more available to plants.
Ensuring Proper Drainage
Proper drainage is essential for preventing waterlogged soil, which can lead to root rot and other plant diseases. While some plants, like those in rain gardens or wetland areas, thrive in moist conditions, most landscape plants require well-drained soil to grow successfully.
To test your soil’s drainage, dig a hole about 12 inches deep and fill it with water. If the water drains within 30 minutes to an hour, your soil has adequate drainage. If the water remains in the hole for several hours, you may need to take steps to improve drainage before planting.
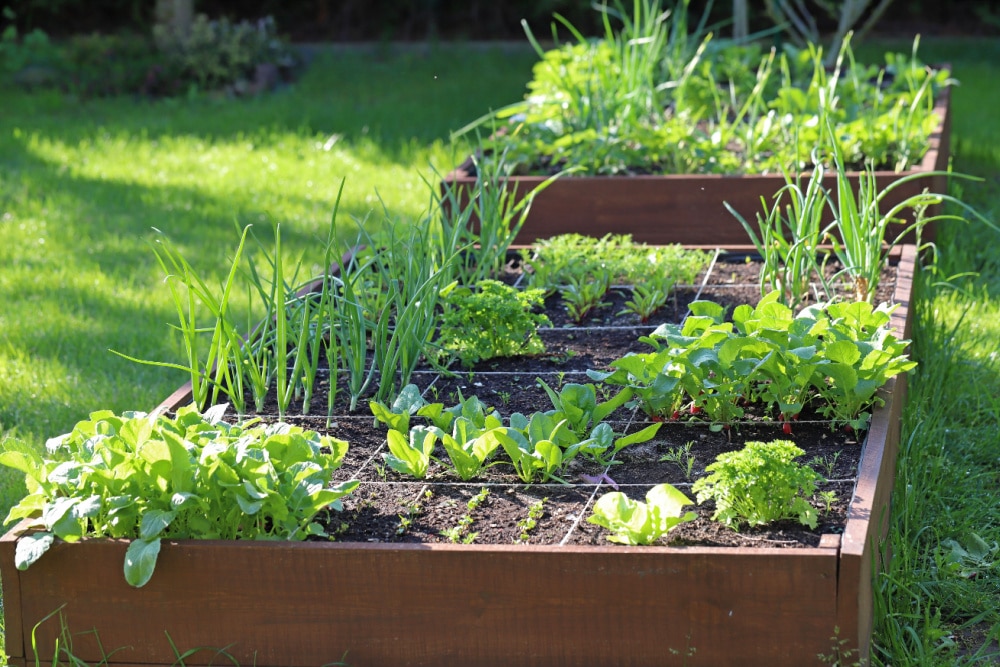
Improving drainage can be as simple as incorporating organic matter to lighten heavy clay soils or installing a French drain or dry creek bed in areas prone to water pooling. For areas with particularly poor drainage, you may also consider building raised garden beds, which provide better control over soil composition and water movement.
Mulching to Protect and Enrich the Soil
Once your soil is properly prepared and your plants are in the ground, applying mulch is a crucial final step to protect the soil and retain moisture. Mulch acts as a barrier, preventing water evaporation, suppressing weed growth, and regulating soil temperature. Organic mulches, such as shredded bark, wood chips, or straw, also break down over time, adding nutrients back into the soil.
To mulch your garden, spread a 2- to 3-inch layer of organic mulch around your plants, being careful not to pile it directly against the stems or trunks, as this can encourage rot. Mulch helps maintain consistent moisture levels in the soil, reducing the need for frequent watering, especially during hot summer months. Additionally, it keeps the soil cooler in the summer and warmer in the winter, creating a more stable environment for plant roots.
Mulching also protects the soil from erosion by reducing the impact of heavy rains and wind. In sloped areas or regions prone to erosion, mulch can be especially effective in keeping the soil intact and preventing runoff.
Conclusion: Setting the Stage for a Thriving Landscape
Preparing your soil properly is the foundation for a successful and healthy landscape. By understanding your soil type, testing its pH and nutrient levels, removing weeds, aerating, amending with organic matter, ensuring proper drainage, and applying mulch, you can create an ideal environment for plants to flourish. Soil preparation may take time and effort, but the results—a thriving, vibrant, and sustainable landscape—are well worth it.
Ready to transform your outdoor space into a lush and beautiful landscape? Contact Cerullo Landscape and Irrigation for expert soil preparation and landscaping services. Our team of professionals will assess your soil, recommend the best amendments, and ensure your garden has the foundation it needs for long-term success. Reach out today to schedule a consultation and take the first step toward creating the landscape of your dreams.
